

You know that moment when you confidently pop something in the microwave, walk away, and return to what can only be described as a cooking disaster? That sinking feeling hits hard. Your trusty microwave has betrayed you, and now it smells like a campfire that went wrong.
That funky smell, though, doesn’t have to linger or recur in your kitchen. With some clever tricks and household basics, you can reclaim your appliance and get back to worry-free reheating.
Are you ready to learn how to get rid of burnt smell in your microwave oven and give it a fresh start?
Why Do These Stubborn Odours Persist?
Burnt smells tend to stick around in your microwave like unwelcome guests. The rubber seals and plastic bits surprisingly absorb those bad odours, and once they’re there, they’re not going anywhere without help.
Here’s where it gets annoying. Each time you warm something fresh, those lingering smells jump onto your food. Your reheated pizza suddenly tastes like that charred popcorn from last week—not exactly appetising.
Speed matters here. Wait too long, and these odours dig deeper into the microwave’s surfaces. What seemed minor becomes a stubborn issue that haunts every snack you heat up.
Common Culprits Behind Microwave Mishaps
Before diving into solutions, let’s examine what typically causes these aromatic catastrophes. Understanding the source helps prevent future incidents and guides your cleaning approach.
Overheated meals top the list of offenders. We’ve all been there, setting the timer for what seems reasonable, only to return to find our lunch transformed into charcoal. High-power settings combined with extended cooking times create the perfect storm for burnt disasters.
Splattered remnants present another challenge. That innocent-looking sauce explosion from last week might seem harmless, but those dried droplets can carbonise over time. Each subsequent use heats these deposits, creating new layers of burnt residue.
Internal component issues represent the most serious concern. Sometimes the burning smell originates from electrical components or the motor itself. These situations require immediate attention and, quite possibly, professional intervention.
Recognising these patterns helps you address problems at their source rather than simply masking symptoms.
Take Swift Action When Disaster Strikes
When confronted with a seriously funky microwave, your first instinct might be panic. Try not to worry, though, as most situations are entirely manageable with the right approach.
Safety comes first. Unplug your microwave immediately. This simple step eliminates any risk of electrical shock while you work and prevents accidental activation during cleaning. Nobody needs the added stress of an unexpected cooking cycle while elbow-deep in cleaning supplies.
Allow everything to cool completely. Hot surfaces make cleaning dangerous and less effective. Use this cooling period to gather your supplies and plan your attack strategy.
Now comes the fun part—deploying natural deodorisers. Fill a microwave-safe container with water and add either fresh lemon slices or several tablespoons of white vinegar. The choice depends on your preference and what’s available in your pantry.
Heat this mixture for 3 to 5 minutes on high power. Watch as steam builds up inside the chamber. This vapour carries the deodorising properties throughout every nook and cranny. The acidic nature of both lemon and vinegar helps neutralise alkaline odour compounds.
Keep that door closed for several minutes after the heating stops. This extended exposure time allows the steam to work its magic on even the most stubborn smells. Patience pays off here.
For particularly resistant odours, baking soda becomes your secret weapon. Create a thick paste using baking soda and minimal water—think toothpaste consistency. This abrasive yet gentle mixture tackles both stains and smells simultaneously.
Apply this paste generously to affected areas, paying special attention to the ceiling and corners where splatters commonly accumulate.
Let it sit undisturbed for at least 10 minutes. The longer contact time allows the baking soda to absorb odour molecules while softening stubborn deposits.
Remove everything with a damp cloth, rinsing frequently to avoid spreading residue around. Multiple passes might be necessary for complete removal.
Try Natural Deodorising Techniques
Mother Nature has got you covered with some surprisingly powerful deodorising weapons that often outperform store-bought cleaners. Plus, they’re way safer to have around your food.
Lemons work like magic here. The citric acid demolishes those stubborn smell molecules while natural oils keep things smelling crisp long after you’re done. Think of it as a mini spa session for your microwave.
White vinegar might hit you with a sharp scent at first, but stick with it. It doesn’t just mask problems. It actually eliminates odours right at their source. That initial vinegar punch fades fast, dragging the terrible smells along with it.
Steam does the heavy lifting for both options. This soft approach sneaks into every corner without requiring elbow grease or harsh chemicals. Your microwave stays protected while getting completely refreshed.
Tough cases might need a second round. Sometimes persistence wins where quick fixes fall short.
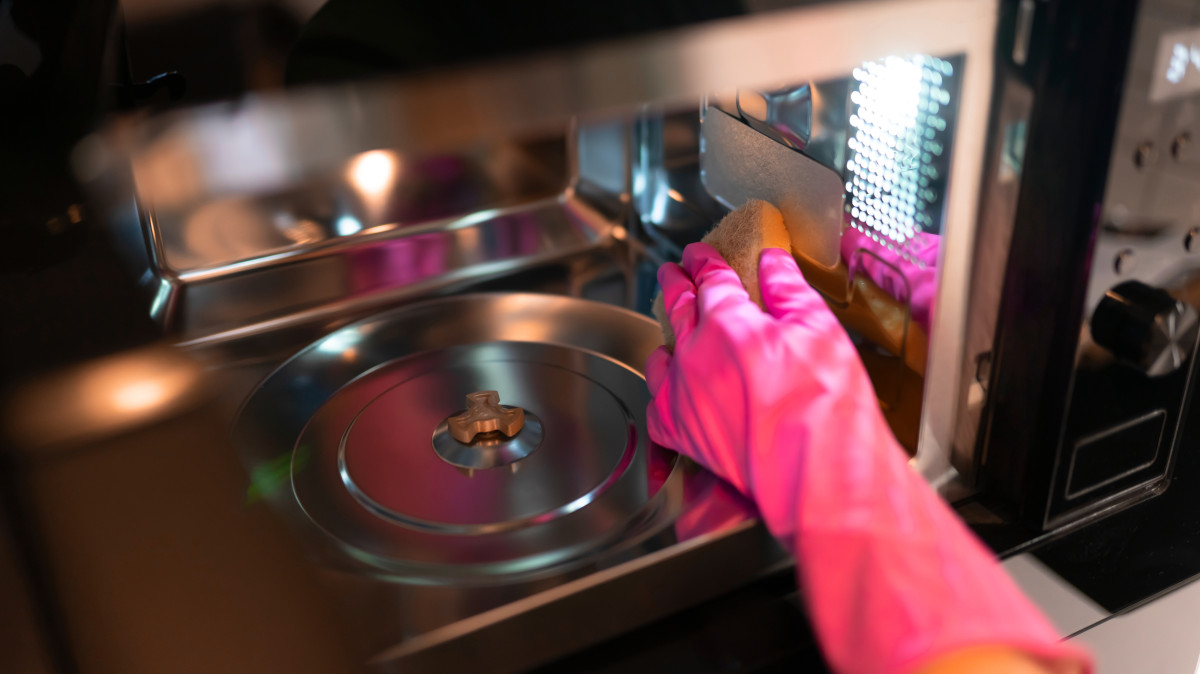
Deep Clean Your Microwave for Long-Lasting Results
Surface cleaning only addresses part of the problem. Thorough deodorising requires attention to every interior surface where lingering odours can hide.
Focus on areas that receive the most food splatter, like the ceiling, side walls, and floor. These surfaces often harbour invisible residue that contributes to persistent odours. Your baking soda paste works wonders here, but application technique matters.
Use a soft cloth or sponge to spread the paste evenly. Avoid aggressive scrubbing that could damage interior coatings. The paste does most of the work. Your job is simply facilitating contact between the cleaning agent and the mess.
Timing matters too. Rushing through the contact time reduces effectiveness significantly. Set a timer and resist the urge to start wiping too early.
Remove all paste residue completely. Any leftovers from the cleaner you used can create new scent problems or affect food flavours. Multiple damp cloth passes ensure nothing remains behind.
Of course, for those who would rather not tackle the grime themselves, professional oven cleaning services offer a reliable, time-saving solution. Whether you’re dealing with stubborn smells or just want to maintain a fresh, hygienic kitchen, expert help can make a big difference.
Long-term Odour Prevention Strategies
Keeping your microwave smelling nice takes steady effort, not just occasional deep cleaning sessions.
Activated charcoal works wonders for soaking up unwanted smells. Just pop a small bowl of it inside your microwave between uses. This clever trick quietly pulls odour particles from the air before they settle in for good.
Swap out the charcoal monthly to keep things working smoothly. Fresh charcoal grabs odours like a magnet.
Baking soda does the same job with even less fuss. Leave an open container inside, and it keeps the air fresh. Replace it every couple of months or whenever it isn’t doing its job anymore
These hands-off methods complement regular wiping down rather than replacing it completely. Consider them your backup plan against future stink disasters.
When Professional Services Become Necessary
Sometimes your best efforts just won’t cut it. Lingering smells after a thorough scrub might signal deeper issues with internal parts that need expert eyes.
Electrical burning odours are red flags you can’t ignore. These scents point to component breakdowns that could spark fires or create other serious hazards.
Motor troubles usually come with weird sounds or sluggish performance. Trained technicians can safely pinpoint and fix these glitches before they turn dangerous.
Don’t cross your fingers hoping problems will vanish on their own. Getting assistance early saves money compared to major fixes or buying a whole new unit.
Maintain Your Microwave Oven Clean
Consistency beats intensity when it comes to microwave maintenance. Regular light cleaning prevents the buildup that creates major odour problems.
Wipe up spills immediately rather than letting them accumulate. Fresh spills clean easily, while dried residue requires aggressive cleaning that can damage surfaces.
Cover food during heating to minimise splatter. This simple step dramatically reduces cleaning requirements while protecting your microwave’s interior.
Consider your cooking habits and adjust accordingly. Foods prone to splattering or overheating need extra attention and possibly modified cooking settings.
Conclusion
A clean, fresh-smelling microwave enhances your entire cooking experience. No more holding your breath when opening the door or wondering if your food will taste funky.
A sparkling-clean microwave is one less worry in your daily routine and one more tool working properly in your culinary arsenal.
Follow the advice laid out above and enjoy your meals once again!


